
How to Convert and Change Strimmer Attachments and Blades on a Stihl Kombi Tool FS-KM
How to Convert and Change Strimmer Attachments and Blades on a Stihl Kombi Tool FS-KM
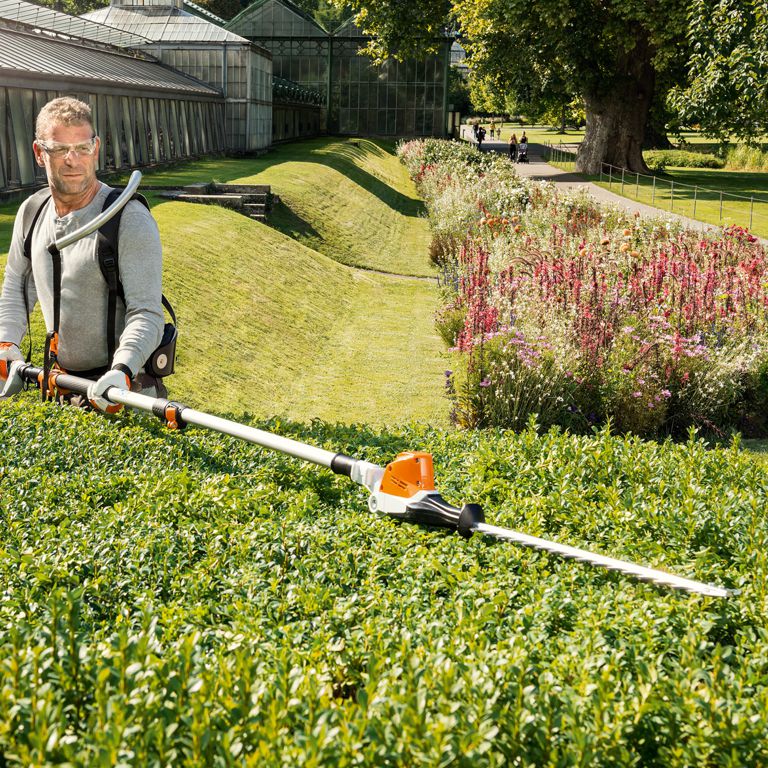
The Stihl Kombi tool is versatile, but it can be confusing to know which attachments fit your model. This guide outlines the correct cutting combinations and how to change a mowing head or blade for various gardening tasks.
What Cutting Attachments are Available?
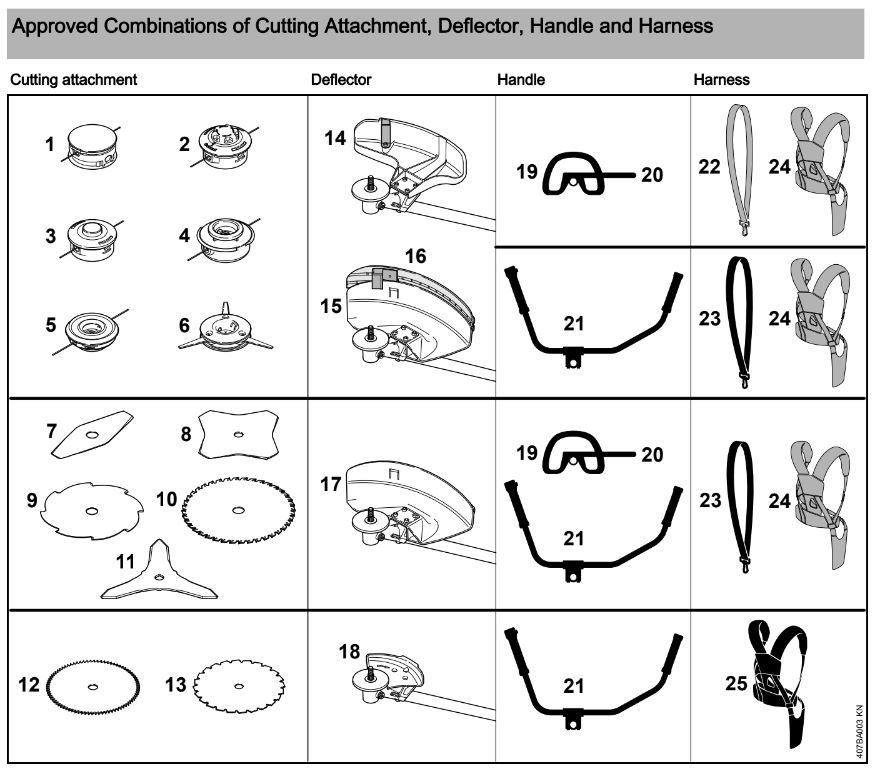
The diagram illustrates approved combinations. For instance, if your cutting attachment is no.12 or no.13, it can be used with no.18, no.21, and no.25.
*Note: Only the components in each row can be used together. Other combinations are not recommended due to safety risks.*
Here’s a breakdown of each number in the diagram:
Mowing Heads
- 1) STIHL SuperCut 20-2
- 2) STIHL AutoCut C 25-2
- 3) STIHL AutoCut 25-2
- 4) STIHL TrimCut 31-2
- 5) STIHL FixCut 25-2
- 6) STIHL PolyCut 20-3

Metal Cutting Attachments
- 7) Grass cutting blade 230-2
- 8) Grass cutting blade 230-4
- 9) Grass cutting blade 230-8
- 10) Grass cutting blade 250-40 Spezial
- 11) Brush knife 250-31
- 12) Scratcher tooth circular saw blade 2001)2)
- 13) Chisel tooth circular saw blade 2001)2)

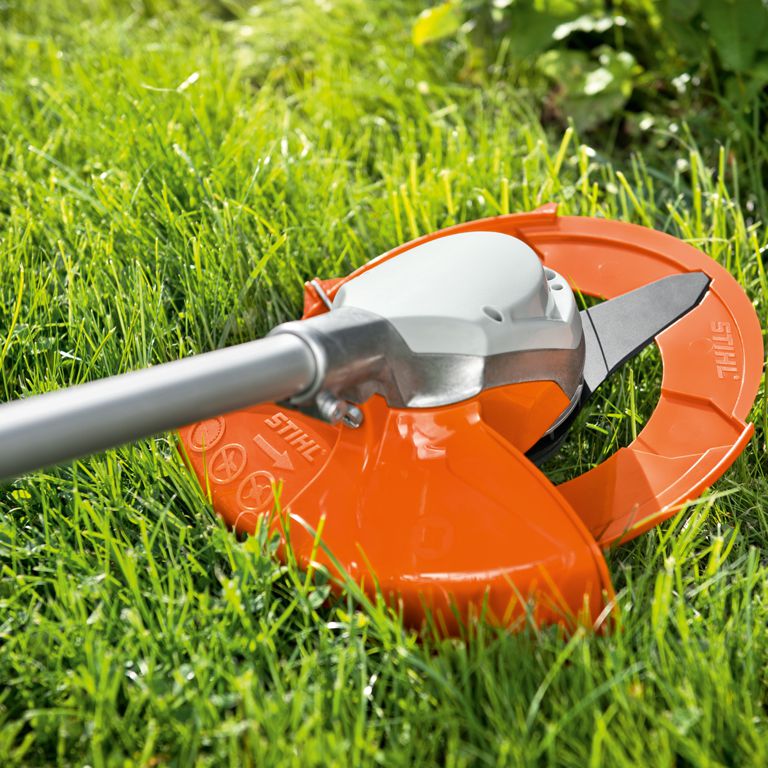
Deflectors, Limit Stop
- 14) Deflector only for mowing heads
- 15) Deflector with
- 16) Skirt and blade for all mowing heads
- 17) Deflector without skirt and blade for all metal mowing attachments and brush knife
- 18) Limit stop for circular saw blades

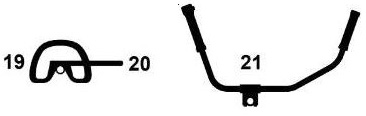
Handles
- 19) Loop handle with
- 20) Barrier Bar
- 21) Bike handle
Harnesses
- 22) Shoulder strap may be used
- 23) Shoulder strap must be used
- 24) Full harness may be used
- 25) Full harness must be used

- Not approved for KM 55, KM 55 R, KM 56, KM 56 R, FS 55 T, FS 55 R
- Not approved for FR 85 T and FR 130 T
How to Mount the Cutting Attachment
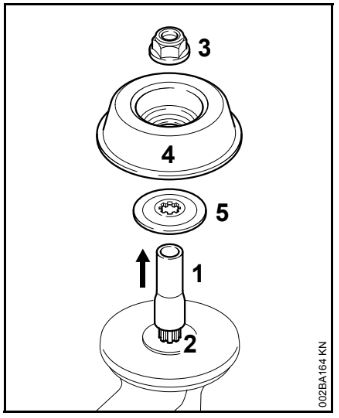
Ensure the machine is off and lay it on its back for easy access to the cutting attachment.
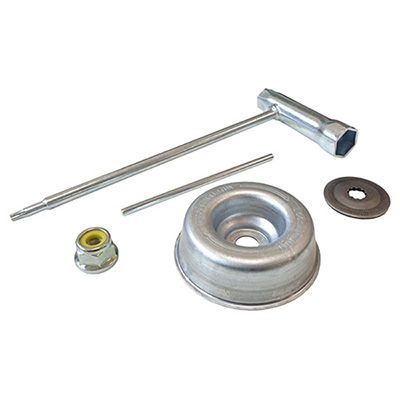
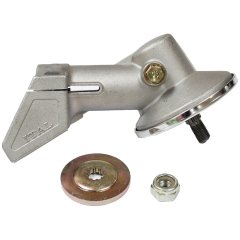
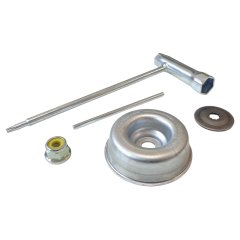
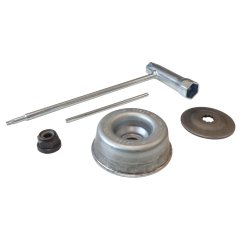
Depending on the attachment (usually a blade), you may need a kit that includes a nut (3), rider plate (4), and thrust washer (5). This kit should come with the machine or can be purchased separately.
Large Metal Blade Fixing Kit for Stihl Brushcutters - 350 193
Small Metal Blade Fixing Kit for Stihl Brushcutters - 350 190
*Note: Check the fitment information to ensure compatibility with your model.*
How to Mount Metal Cutting Attachments
Different blades are designed for specific tasks. The cutting edges of (2), (4), and (5) can point in either direction. The cutting edges of (1), (3), (6), and (7) must point clockwise.
- First, fit the thrust washer (10) with the convex side facing up.
- Next, fit the rider plate (11).
- Then, block the shaft (12).
- Finally, use the combination wrench (14) to screw the mounting nut (13) onto the output shaft counter-clockwise and tighten securely.

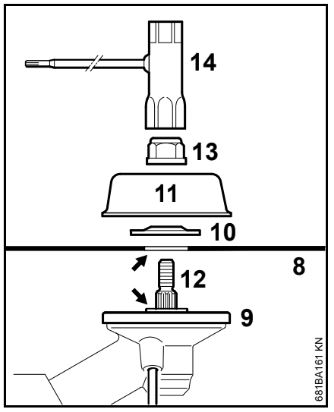
How to Remove the Blade
- Start by blocking the shaft.
- Then, use the combination wrench to loosen and remove the nut (13) by turning it clockwise.
- Finally, remove the parts from the shaft without taking off the thrust plate (9).
How to Fit the Mowing Head with Screw Mounting
- First, screw the mowing head counter-clockwise onto the shaft (1) until it stops.
- Then block the shaft.
- Finally, tighten the mowing head securely.


© 2026 L&S Engineers Ltd. All Rights Reserved.
The UK's leading supplier of spare parts for plant hire, construction and groundcare since 1971.
Company No. 04224976.
eCommerce by AYKO